ASPEC makes it easy to create and modify Account forms.
To create a new account simply click the Create>Account button in any listview of ASPEC.
Note: This option is not available to users who do not have the right to create Accounts, based on the setting in User Profile.
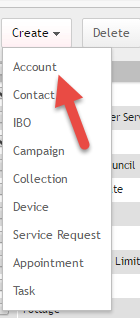
Fig 1: Creating an Account
New Account form has the following fields and sections:
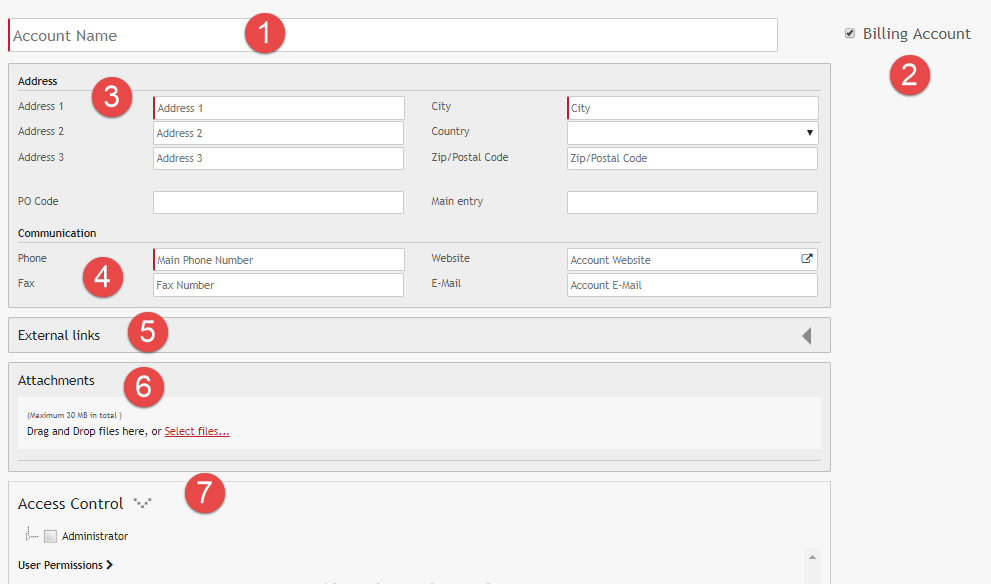
Fig 2: Form for creating an new Accoun
- Account name
You may see a Google Assistant above this field if Google Places is enabled by your Administrator. Simply start by typing in the company name and wait for the matching results to return and then populate the address fields.
To narrow down the search to your local area, include the city in the search box.
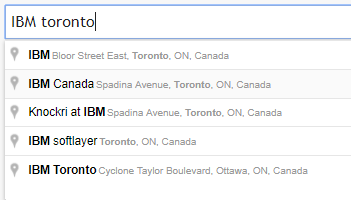
Fig 3: Searching for IBM in Toronto area
If the Google Assistant is not enabled, enter all fields manually.
2. Legal entity checkbox. You may see a different text here, depending on your Organization’s settings. More on Legal Entity here.
3. Address
4. Communication to capture address, email, phone number etc. The ASPEC Aadministrator controls which fields are required via the Setup section.
5. Custom Field sections
6. Attachments to be uploaded during the Account setup
7. Access Control refers to a hierarchy of permissions that can be granted to different users with different rights. Read more on Access Control here.
Required fields are denoted by a red bar. In the image above, Account Name, Address 1, City and Main Phone Number are mandatory. After all the required fields have been filled out, you can save the new Account.
Note: Depending on your Organization Profile, you may be able to create a new Account when creating a new Contact or IBO. If the Contact or Account is not found while creating an IBO, you will see the option to ADD A NEW ACCOUNT.
Once all the fields have been filled out to the operators satisfactory the document can be Saved or Saved & Closed.