The marketing module in ASPEC offers a Tradeshow feature in Scope. To configure a Tradeshow, first users have to be given permission to see Scope on the user profile level.

The administrator may also give themselves and other users the ability to view all scope-related records in the user profile. (Note: If this option is not selected for a user, they will not be able to see Tradeshows that they are not either an event administrator or a participant.)

First, begin by creating a fresh Event in an existing or a new Campaign.
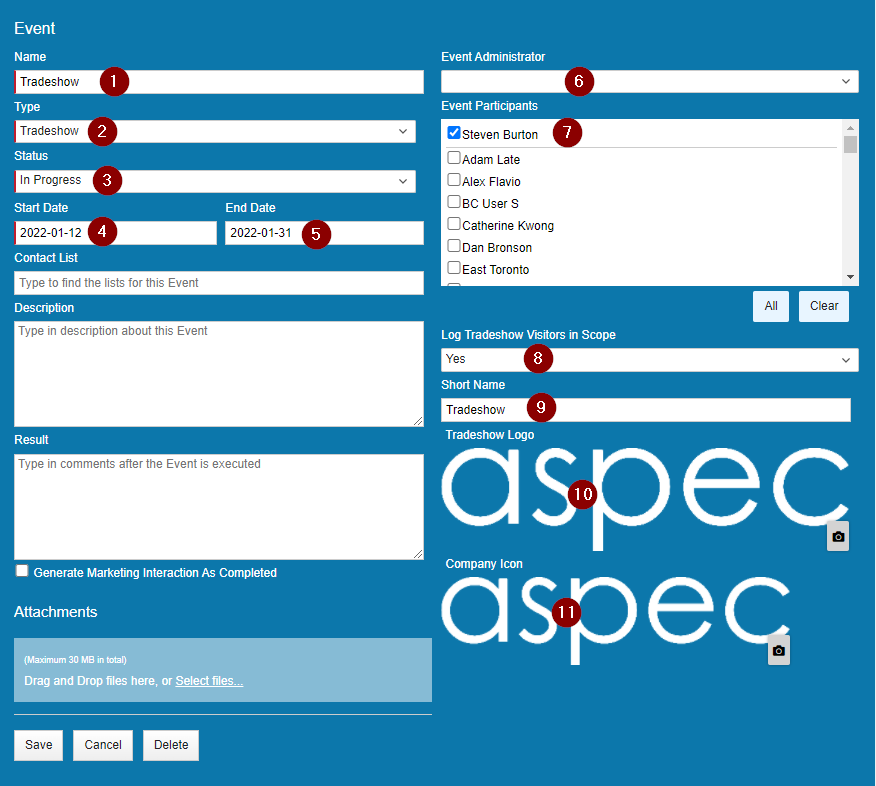
Figure 3 Explained
- Name the Event appropriately.
- Select “Tradeshow” as the event Type
- Status has to be In-Progess to enable Tradeshow button in Scope.
- Select appropriate start date for the Event
- Select appropriate end date for the Event
- Select Event Administrator
- Select Event Participants
- Logging Tradeshow visitor in Scope will enable Tradeshow functionality in Scope, Select “Yes”.
- Short Name represents the value in the button label inside Scope for Tradeshow functionality.
- White label option for Tradshow logo showing up at the top of the page in Tradeshow functionality.
- White label for company logo inside Tradeshow.
Save & Close both Event and Campaign
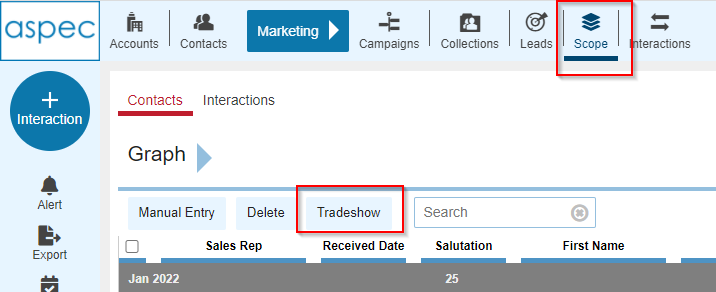
In the Scope Listview Section.
The Tradeshow button will now be available. Click the Tradeshow button to begin the process.
The tradeshow interface will have 3 initial elements
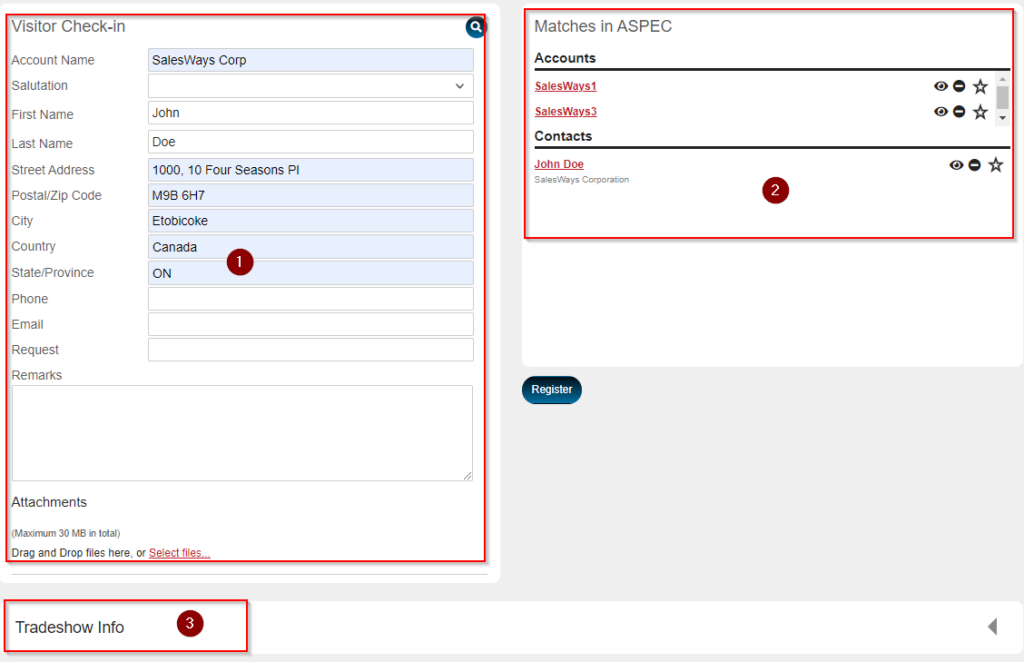
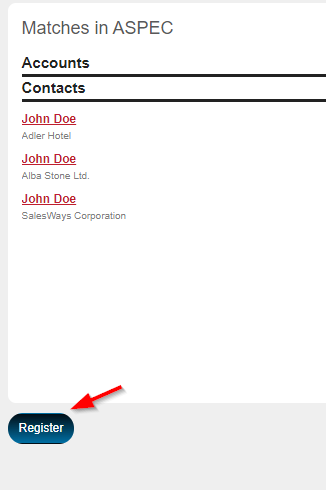
- Match finder. Same functionality as in Scope records a user may find matches in the system prior to submission.
- The location where matches will be displayed and selected for the Scope record.
- Custom fields area that will be populated when the Scope Record is created.
When the matches or new record is selected. Click Register.
Registered Tradeshow Contact
Contact is now registered and a record has been created in Scope. The Tradeshow window will allow the user to perform several actions.
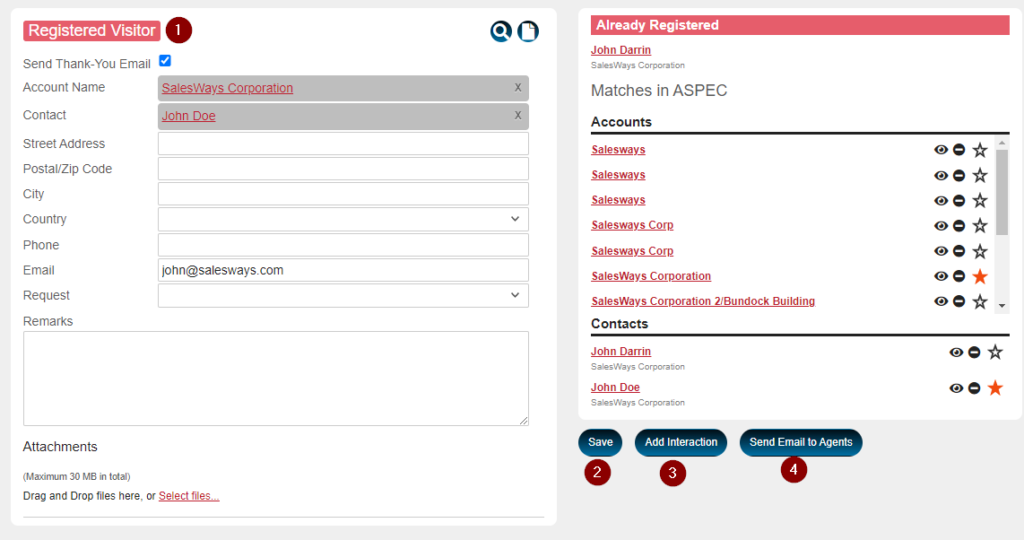
- An indicator that the visitor was successfully registered.
- User may enter changes to the Tradeshow record and save it in the Scope record.
- Ability to Add Interaction to the Scope record.
- Send Email to Agents – this will provide the option to send an email to event participants and administator.