Overview
ASPEC Microsoft Outlook Add-In pushes selected Emails into ASPEC, synchronizes Appointments and Calendars from ASPEC into Microsoft Outlook, and copies selected Contacts from ASPEC into Microsoft Outlook Contact List.
Installing the Add-In
The Add-In is available with ASPEC.
Clicking setup.exe unzips and runs the installation. When the installation is completed, users see the ASPEC tab under Add-Ins.

Fig 1: Installed ASPEC Add-In for Emails and Calendar
Users need to configure the connection to ASPEC from MS Word Add-In. Clicking Settings loads a dialog with the URL to fill, the username and the password. Before using the Add-Ins, users should click Test Connection and wait for a green confirmation “ASPEC Connection Parameters Are Correct”.
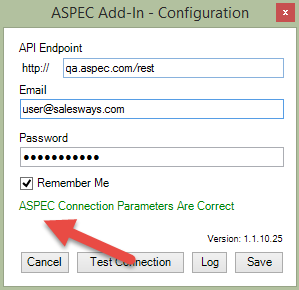
Fig 2: Dialog for configuring a connection from MS Outlook to ASPEC
After a successful connection uses can use the Add-In to push Emails and synchronize the Calendar.
Synchronizing the Calendar
Users press “Sync Calendar” to receive updates from ASPEC Appointments and Tasks.
The Add-in will update your Appointments and Tasks in MS Outlook with the Appointments and Tasks from ASPEC. At the end of this process you will see a confirmation message and MS Outlook will display the list of synchronized records.
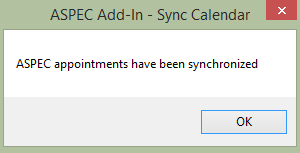
Fig 3: Confirmation dialog
Pushing an Email from MS Outlook to ASPEC
Users select an Email and press “Push Emails”.
ASPEC will search for Contacts with matching Email address based on the Sender and the Recipient of the Email you selected. When the search is completed, ASPEC presents a dialog for selecting the recipient(s) and other options.
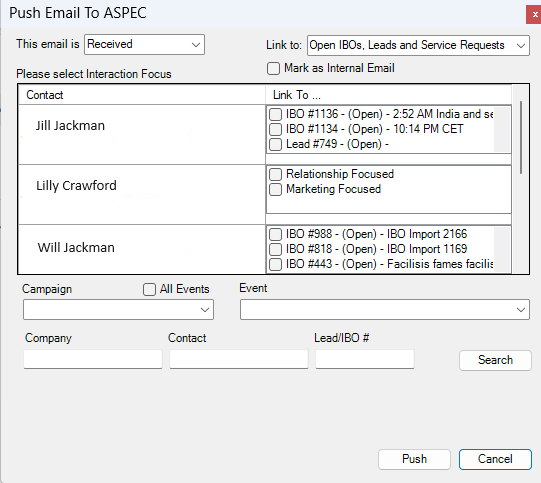
Fig 4: Copying (pushing) an Email
The dialog provides the selection for the following options:
- Email Status: Sent or Received
- Option to show only open Leads and IBOs or all Leads and IBOs for each Contact in the dropdown for linking Emails ( #5 in the image above). Select “Show Open Leads/IBOs only” to shorten the dropdown list.
- Ability to mark the Email as Internal, i.e. not sent or received from ASPEC Contact. An example of an Internal Email is a note sent from one team member to another, describing a proposed strategy of winning a particular IBO. That Email can be linked to that IBO.
- Recipients: Contacts matching Email address(es) will be listed here. Users can specify a different Contact by performing a search if area #6 in the image above.
- Email focus selection: A dropdown for selecting from “Skip” (default, do nothing) , “Relationship” and the list of IBOs and Leads linked to each Contact. Users can also skip copying the Email under the selected Contact(s) by leaving the “Skip” option.
- Sometimes users wish to link the email to a different Contact. A dialog contains fields for searching ASPEC by Account or Contact Name. Pressing “Search” performs the search and displays the results in area #4 in the image above
- Button to push the Email. Pressing the button copies the selected Email under Contact(s) in ASPEC.
- Button to cancel.
The Add-In displays a message after the Email is copied under one or more Contacts.

Fig 5: Conformation message
Copying selected Contact from ASPEC to individual MS Outlook Contact list
Users click “Pull Contact” to copy a selected Contacts from ASPEC into MS Outlook.
Clicking the button displays a dialog for searching ASPEC by Account (Company) and Contact name.
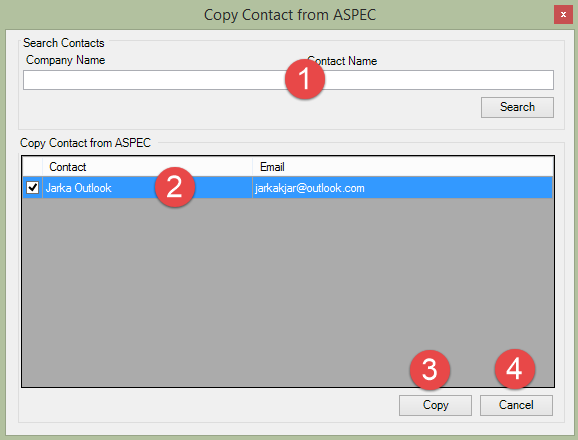
Fig 6: Dialog for copying Contacts
The dialog provides the following controls:
- Fields and a button for searching Contacts
- Area for displaying Contacts found in ASPEC
- Button for copying Contacts that are checked (selected) in the area #2
- Button for canceling the copy action.