Configuring custom form layout is done by ASPEC Administrators in the following 2 or 3 steps:
- Adding Custom Fields
- Configuring sections of Custom Fields
Optionally, as Step 3, you can configure Page Workflow to hide sections of Custom Fields or filter values in Custom Fields.
Adding Custom Fields to a form
First, click Settings and open a Setup. Navigate to a Page Setup for a form,
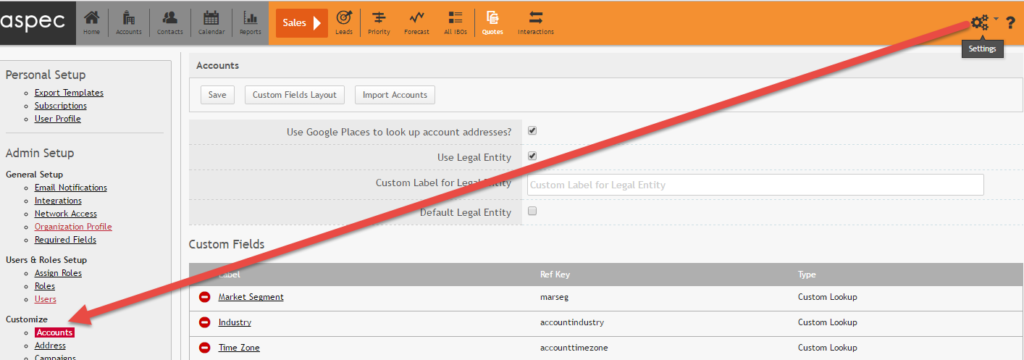
Fig 1: Opening Account form setup
Custom Fields section stores fields that might or might not be added to the Fields Layout. If the field in not added to the Fields Layout, then it will not be displayed on the form.
In the Custom Fields section click on the “Add Custom Field” link next to a green “+” button. In a new dialog enter the field label, unique name (Ref Key). Mark field Read-Only if applicable. Ref Key and Read-Only are useful for Formula Fields.
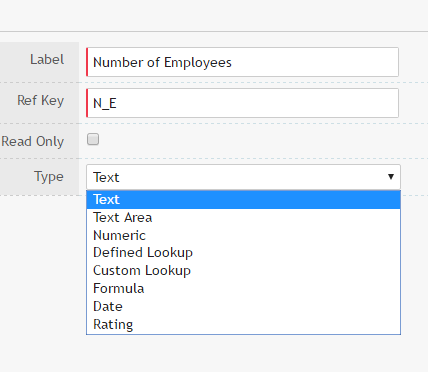
Fig 2: Adding a Custom Field
Select a field type from the following options:
Text: one row of text
Text Area: multi-row text
Numeric: decimal number, displayed according to the user’s Locale settings in the User Profile.
Integer
Defined Lookup: list of values configured for standard fields in Lookups setup. Ensure that you have a relevant Lookup list before configuring Defined Lookup field.
Custom Lookup: list of values configured for custom fields in Lookups setup. Ensure that you have a relevant Lookup list before configuring Custom Lookup field.

Fig 2: Options for Lookup Custom Fields
If the lookup is multi-valued and the list of options in long, consider making the field searchable, rather than just a scrollable checkbox.

Fig 3: Search option added to a scrollable checkbox
Formula: simple mathematical formula using custom fields
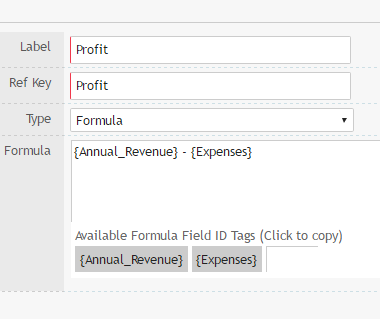
Fig 4: Formula Field
Date: date, displayed according to the user’s Locale settings in the User Profile.
Rating: clickable “star” images ( ![]() ), stored as Integer for reporting purposed. For this field type specify the maximum number of images.
), stored as Integer for reporting purposed. For this field type specify the maximum number of images.
Click Save when done configuring the custom field.
Note: Changing field types is problematic if fields types cannot be automatically converted, eg. from text field “Hello” to a date field. If you want to change the field type, you need to delete the old Custom Field and add a new Custom Field.
Configuring sections of Custom Fields (Fields Layout)
Custom Fields are grouped into sections on the page. If the custom field is not assigned to any group is not available on the form.
Section collapse or expand automatically when the form is loaded, depending on the setup.
To configure the section, click “Custom Fields Layout” at the top of the Setup form.
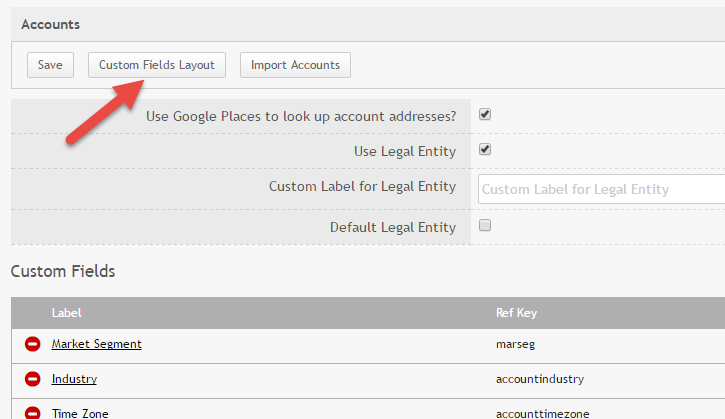
Fig 4: Configuring Custom Fields location on the form
The Page Layout allows to create sections and drag and drop custom fields into these sections.

Fig 5: Configuring sections of Custom Fields
Perform the following steps to add a section to the form:
- Click “New Section” to add a new section to the form
- Change the section label.
- Drag a field under a section. You can move fields within the section by dragging and dropping
- Collapse or expand that section when the form is loaded
Add more sections if needed. You can change the sequence of the sections by dragging them up or down.
Don’t forget to click Save when done.
Page Workflow
It is possible to hide a Custom Fields section based on a value of a Custom Field, or limit the available values in another Custom Field dropdown. Read more on customizing Workflows here.
Note: it is not recommended that you change its type after the field is in the production. If you remove the field that is a part of a workflow, please remove the related workflow as well.[:]